Showing posts with label Light. Show all posts

Sunday, February 10, 2013

Beginning to Blog Week 3: Camera ISO


Here, kitty, kitty.

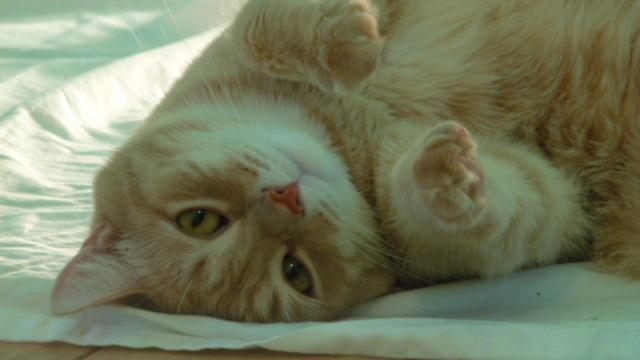
Finally! I finally got some vivid photos. And, luckily I had the cutest little muse. These are the best I have taken yet. I was able to get these results by adjusting the ISO on my camera to the lowest setting. Adjusting the ISO (or sensitivity) allows the camera to let in more light without using flash. The less ISO, the less grainy the photo. In my opinion, it allows me to have that intense feeling I am looking for in each picture. 

I do not have a digital SLR. I have an Panasonic Lumix DMC-ZS10. These photos are all taken in natural light using an ISO of 100. they were not digitally enhanced. I have found it was absolutely necessary to have my camera set on a solid surface to get clean, unshaken photos. A tripod would have been useful. I still think I need to work on focus. They still seem a tiny bit blurry to me. 

PhotographyLife.com has a great article about ISO. 


Stay tuned for posts about aperture, focus, shutter speed, light settings and more!


Saturday, February 2, 2013

Beginning to Blog: Week 2 - Setting Up a Light Box Studio


Let's do this thing! I am ready to go. I bought some regular white tissue paper at Big Lots. I have a cardboard box, some scissors, and tape. Woot.

I followed the technique outlined in Strobist's post about How to DIY a $10 Macro Photo Studio. It takes about a half an hour to create and it is easy and cheap. The results are much better (see elephant above), do you agree?

Tools:


  • One Cardboard Box
  • White Tissue Paper
  • White Paper (Tracing Paper, Butcher Paper or any paper that is nto transparent)
  • Scissors
  • Masking Tape (I used blue painter tape)
  • Box Cutter
  • Two Bright Lights

Steps:


  • Keep the bottom of the box taped shut. 
  • Cut off one of the flaps on the top of the box (the one that would be positioned at the top when the box is complete - see images).
  • Using the box cutter, cut out a large window in three sides of the box. Please be careful not to cut yourself. Stay out of the path of the box cutter. I almost got cut a couple times. I escaped unharmed!
  • Cover each window with a piece of white tissue paper and tape it to the box. 
  • Tape a piece of paper draping like a photo studio on the inside of the box. Do not use tissue paper on the inside (as shown). Use butcher paper or another type of paper that is not so transparent. 
  • Point a light into the box on both sides and place your subject in the box to be photographed. 

Verdict: 


I like this technique much better. I may try some different lights. I also want to take some photos using my flash. 


Stay tuned for more experiments: Creating a Light Box out of Foam Board, Camera Settings, Fluorescent Lighting, Natural Lighting, Butcher Paper, Tracing Paper.